WeCam manages and controls the specific video content you want to play and output through projects (ie scenes).
Project/Scene
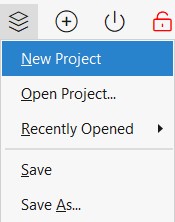
Click the first button in the toolbar above the scene window to display the project menu, and you can create, open or save a project.
Please refer to the description of output for the project resolution, frame rate and other settings.
Each project consists of one or more media objects.
Media object
Different media objects can be added to the project to play different media. For example, if you want to play a video with a picture superimposed on it, you can create a video object and a picture object, and place the picture object on top of the video object.
Click the button to the right of the project menu button to add media objects. Currently WeCam supports video, picture, camera, screen capture, and streaming There are many types of media such as media, mobile phone screen projection, and text.
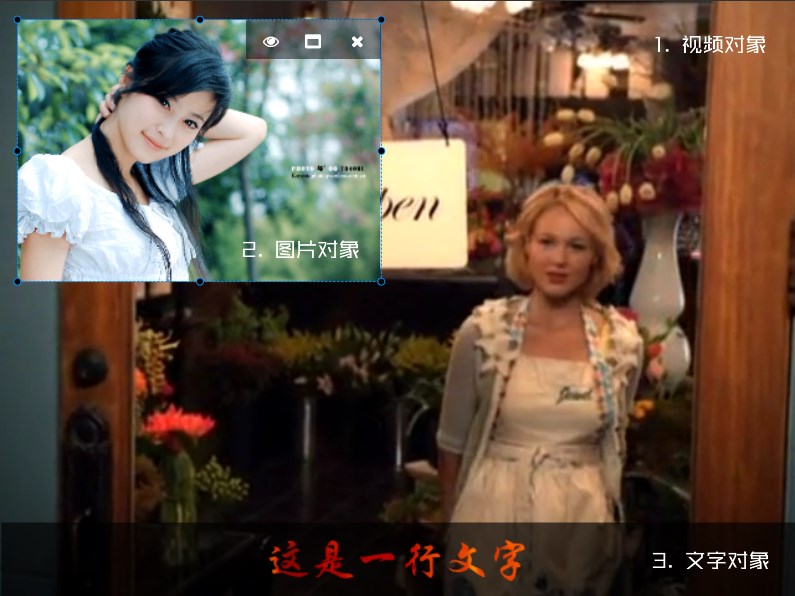
The following figure is a simple scene example, which includes a video object (layer 1), a picture object (layer 2), and a text object (layer 3):
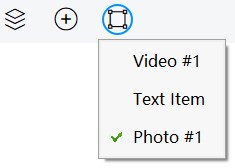
You can directly click an object in the scene to select this object as the current object for editing or modification. You can also select an object as the current object through the object selection button:
In addition, you can also use the system hotkey Ctrl+Alt+[1..9] to select the specified object as the current object.
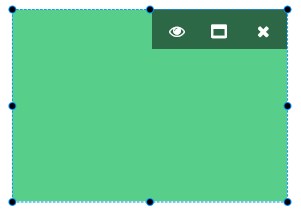
Select box and toolbar
After the object is selected, a selection box and toolbar are displayed. You can easily drag the object through the selection box to modify its display position and size.
Toolbar
- : Is the object content actually output or just previewed in the scene window;
- : Maximize the object to fill the entire scene or restore the original size to display;
- : Delete the media object.
Double-click an object to maximize the object or display it in its original size, and click again to hide/show the selection box and toolbar on the same object.
Object menu
Right-click on a media object to display the object shortcut menu, which mainly includes the following functions:
- Output: Whether to output to the final video or just preview, it has the same function as the button on the toolbar ;
- Lock: Once locked, you cannot use the select box to modify the position and size of the object;
- Transformation: Some general transformations of the object content, including rotation, mirroring, zooming in and out, etc.;
- Zoom method: How to zoom and crop when the object content size is different from the object display size;
- Play rate (video only): the play rate selection of the video object;
- Up and down order: You can adjust the up and down position of the object in the entire project, and the objects below will be covered by the objects above;
- Exchange position: You can exchange positions with other objects, including up and down order;
- Centering: Make the object in the middle of the whole scene;
- Delete: Delete the object and its corresponding media;
- Properties: The property panel corresponding to the object is displayed on the left side of the main window
You can easily use the keyboard to move the position of the object in the scene (up, down, left, and right keys), modify the upper and lower layer position of the object (CTRL+up/down), zoom the content of the object (CTRL+plus/minus), or press the Del key Delete the object.
Scene window
The output of the entire project is displayed in the scene window, of course, including only previewing projects that are not actually output.
Double-click the blank area of the scene window or the locked object, you can switch between full-screen playback and window playback. You can also use the keyboard Ctrl + Enter / Esc shortcut to achieve the same Effect.
Media Control Panel
The bottom of the scene window displays the current media information and playback progress. If the media supports it, you can modify the progress, pause/resume playback, or set the current media playback volume.

In addition, you can also take a snapshot of the actual output of the entire scene, record a video (MP4 or GIF), and also set the microphone volume and voice change effect when recording a video (The Settings here also work for live video).
Basic tutorial
For media objects and output methods, please see: