
iVCam is designed to be simple yet powerful inside. Most of its features are clear, while some features are not. Here’re some feature descriptions and tips for it.
For free version restrictions and purchase related questions, please check here.
Connect by IP address
Tap the add button in the APP to enter the IP address of the computer running the iVCam client to connect. The number in the second column represents the instance ID when using multiple instances, such as to connect to the second of 2 iVCam instances running on the PC, enter “iVCam #2” here.
Connecting history
Long press the play/add button / in the main view to show the IP addresses list of all PCs the app has ever connected to, you can choose which one to be connected if you have more than one PC running iVCam PC client.
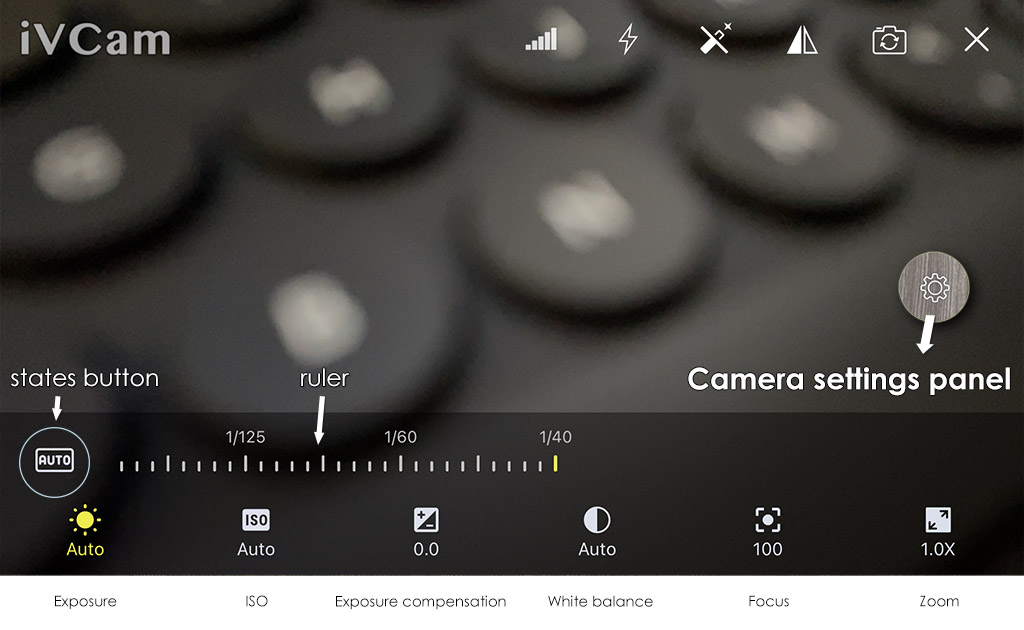
Manual-Focus, Auto-Focus and Auto-Exposure (AE / AF)
It works the same way as the “Camera” app.
Tap the screen to “manual-focus” – it will focus on the area you touch and adjust the exposure time, ISO and white balance once then lock these values. When it detects light-changes or subject-movements, it will “auto-focus” and adjust these values automatically (AE / AF / AWB).
Long-press the screen to enable “AE/AF LOCK” to lock these values, but will not detect changes in light or subject movement.
Tap the screen to “manual-focus” again in this case, or long-press the screen again to change to “AE/AF LOCK” mode, in which case tapping the screen will do nothing, and you can only long-press the screen again to unlock and change back to “auto-focus” mode.
Check Camera Settings to learn more about the setting of camera parameters.
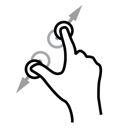
Zoom in/out
You can zoom in/out the video to adjust the zoom factor just like using the “Camera” app, or you can adjust it using the scale in the Zoom page of the Camera Settings.
Using different cameras

Mobile phones now have multiple cameras, tapping the button in the upper right corner of the video in iVCam will switch between the different cameras on the phone.
-
For iOS devices, the default behaviour is to switch between the phone’s multiple hardware cameras (front → back ultra-wide → wide-angle → telephoto → front…)
You can choose how to use the back cameras in “Settings > Back Camera” of the iVCam APP (“Single Camera” is selected by default).
If you choose “Back Multiple Camera” (including Back Triple Camera, Back Dual Wide Camera and Back Dual Camera), the camera will only switch between Front and Back. When using the Back camera, the camera switches seamlessly between ultra-wide angle, wide-angle, and telephoto camera when zoom, focus, and lighting changes. The Zoom page of the Camera Settings will show which camera is currently being used, the 3 icons represent ultra-wide angle, wide-angle and telephoto cameras respectively.
Due to system limitations, when using “Back Multiple Camera“, the values of Exposure, Focus and White Balance cannot be manually adjusted through the scale. If you need to adjust them manually, select “Single Camera” in the “Back Camera” option.
In addition, the Maximum FPS supported by different cameras is also different. For example, in the latest iPhone, the maximum FPS is 60 when using “Back Multiple Camera“, but it can go up to 240 when using “Single Camera” for back cameras. The front camera tops out at 120 FPS.
- For Android devices, please make sure that the system is at least Android 9, and also that the manufacturer allows other apps to use these lenses.
In many cases, the manufacturer’s own camera app can switch between different lenses, but it does not provide an interface for other apps including iVCam to use, so iVCam cannot switch between these lenses. This is not a bug or functional limitation of iVCam. Check Google’s official instructions for more details.
When using the Back camera, the camera switches seamlessly between ultra-wide angle, wide-angle, and telephoto camera when zoom, focus, and lighting changes.
Tip: Switching cameras can reset the values of camera settings (including the Exposure time, ISO, Exposure Compensation, White Balance, Focus, Zoom, etc.)
Using different MIC (iOS only)
iPhone has several microphones , and iVCam will use the default one (bottom) at first. When the button was tapped to change camera, iVCam will change MIC accordingly – front MIC for front camera, and back MIC for back camera.
Save battery power
iVCam app will close video and show black screen to save battery power after a while if there’s no user actions (transfer will still work). You can tap it to show the video again, but this time it will keep showing the video without closing it and showing black screen.
The iVCam Android app supports running in background. You can directly press the phone’s power button to turn off the screen and reduce power consumption.
Network signal
There’s a network signal icon on iVCam video. It means that your phone’s network is not good enough to transfer video if it’s not full, and the video frames will be dropped sometimes in this case to keep the video transferring in time.
Reconnecting
You can re-search the iVCam PC to connect and transfer video by tapping the refresh button in the main view.
Advanced Settings
Long press the “Help” item in the settings to display the advanced settings page. Generally, it is not recommended to modify the settings here.