
iVCam is designed to be simple yet powerful inside. Most of its features are clear, while some features are not. Here’re some feature descriptions and tips for it.
For free version restrictions and purchase related questions, please check here.
PC client software
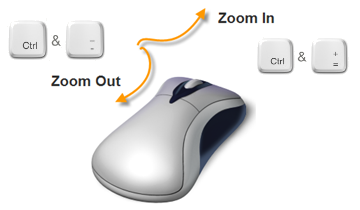
Zoom in/out and Manual-Focus
You can use mouse wheel on video or press “CTRL +” / “CTRL –” to zoom in or out, and click on the video to change focus, just like using the mobile app.
Shortcuts
You can use the following shortcut keys to perform common operations in iVCam (^ means Ctrl key):
| ^I | Connect via the phone’s IP address |
| ^D | Connect / Disconnect |
| ^+ / ^- | Zoom in/out video |
| ^O | Open camera settings window |
| ^P / Pause | Pause/Resume video transmission |
| ^S | Take snapshot |
| ^T / Ctrl + | Time-lapse shooting |
| ^R | Start/stop video recording |
| ^Q | Cancel video recording (Not saving video file) |
| Shift + or | Do not play the prompt sound when the button is pressed |
| ^B | Show registration window |
| ^G | Select the media file for background replacement |
| ^W / ^TAB | Borderless window |
| ^H / F1 | Help |
| ^Enter / double-click | Enter full screen mode |
| Esc / double-click | Return back from full screen mode |
System global hotkeys (supports multiple instances and can be modified in Settings):
| Ctrl + Alt + P | Pause/Resume video transmission |
| Ctrl + Alt + S | Take snapshot |
| Ctrl + Alt + T | Time-lapse shooting |
| Ctrl + Alt + R | Start/stop video recording |
| Ctrl + Alt + Q | Cancel video recording (Not saving video file) |
Command line parameters
The following parameters are supported when running iVCam.exe:
| /debug | Generate logs |
| /silent | Silent mode – The window is hidden by default and no notification messages |
| /fullscreen | Run in full screen mode |
| /reg ##### | Use the license code “#####” to register the software, the same computer only need to call once |
Settings
Explanation of some options in the settings dialog:
| General > Video Size > This size only | In addition to the selected video size such as 1280 x 720, iVCam also supports 640 x 480 and 320 x 240 by default, which supports a total of 3 output resolutions and provides better compatibility. Selecting this option allows iVCam to output only the video size, thereby forcing other programs to use this resolution only. You can try this if the iVCam video is in low quality in other applications. |
| General > Video Format | Some applications have problems with the processing of different video color spaces, which is manifested by the color cast of the video. You can force iVCam to output only RGB or YUV format to see if there will be improvement. |
| General > Audio > Recording Device | When recording a video, you can choose to record the sound from your mobile phone (the sound recording function should be enabled on the APP side), or the sound from the microphone of your PC. |
| General > Audio > Playback Device | To which device the PC client should play the sound recorded by the mobile phone (if the sound recording function is enabled on the APP side). |
| Miscs > Hardware Decoding | iVCam will enable hardware decoding by default, and CPU decoding will be used after failure. You can choose different hardware decoders here to see which one can be used, which has better effect and lower resoruce usage. |
| Miscs > Preferred GPU | Users with multiple graphics cards can specify which GPU to use for iVCam video decoding, encoding and background replacement. You can also use different GPU for video decoding and encoding by modifying the value of the registry key “DecodeGPU” and “EncodeGPU”. |
Video Recording
In order to reduce the CPU/GPU usage, we record the video file entirely with the data transferred from the mobile phone, instead of re-encoding the video (When using the background replacement feature or iVCamEx, the video is re-encoded when recording). iVCam data transfer will be affected by the video size, network bandwidth, mobile phone and computer performance, and the video will lose frames if the bandwidth or performance is not enough, so the final recorded video file may not have a fixed frame rate, and it may be out of sync in some video editing software, or even not playable in some video players.
You can use video format conversion software to convert the recorded MP4 file to fixed frame rate format and then play or put it into video editing software to edit. Alternatively,
- Use iVCam microphone instead of mobile phone as the default recording device in the iVCam PC client settings;
- Use USB connection which is more stable;
- Use smaller video sizes, lower video quality and frame rates;
- Use other camera video recording software to record video from the iVCam camera, check here for the sound recording instructions.
If the recorded video can’t be opened due to program crash and other reasons, you can try to use the video repair tool to fix it, check here for more details.
There is no such problem with taking pictures, what the iVCam camera shows is what is captured.
Snapshot and Video Recording file name
By default iVCam takes photos and videos with the file name “date+time.jpg|.mp4”, you can add a prefix to the file by modifying the registry item:
HKEY_CURRENT_USER\Software\e2eSoft\iVCam\SavePrefix (REG_SZ)
For example, if you set this value to “IV_”, the name of the recorded video file will be “IV_date+time.mp4”.
For multiple instances, you can use Instance#0#SavePrefix to set the prefix of Instance #1, Instance#1#SavePrefix to set the prefix of Instance #2…
Performance Issue
iVCam will use the GPU to perform hardware decoding of the video by default (if hardware decoding is not selected, the CPU will be used for decoding). The background replacement function will also occupy the GPU, and displaying the camera video will also occupy the GPU. If you also use other GPU-intensive programs such as live broadcast programs, video lag or other problems may occur if the graphics card is not good enough.
If you confirm that the problem is caused by high CPU/GPU usage by checking the system’s task manager, you can improve it in the following ways:
- Click the “×” button to run iVCam in the background. In this case, iVCam will not display the camera video, which will reduce the usage of the GPU;
- When you have multiple graphics cards, you can select a different GPU from other programs in Settings > Miscellaneous > Preferred GPU;
- Close other programs that occupy too much CPU/GPU;
- Use smaller video size and lower video frame rate (25 or 30 is recommended).
For issues regarding data transmission performance, please see iVCam FAQ.
Generate Logs
If you have any problems using our PC client software, you can enable the log function and send the log file to us for investigation:
Check Settings > Miscs > Generate Logs, then close the application and run again.
After you finish your operations, open Settings > Miscs, and click the button after Generate Logs to open the log directory.
NOTE: After enabling the logging option, the video bitrate will also be displayed at the bottom of the main window.